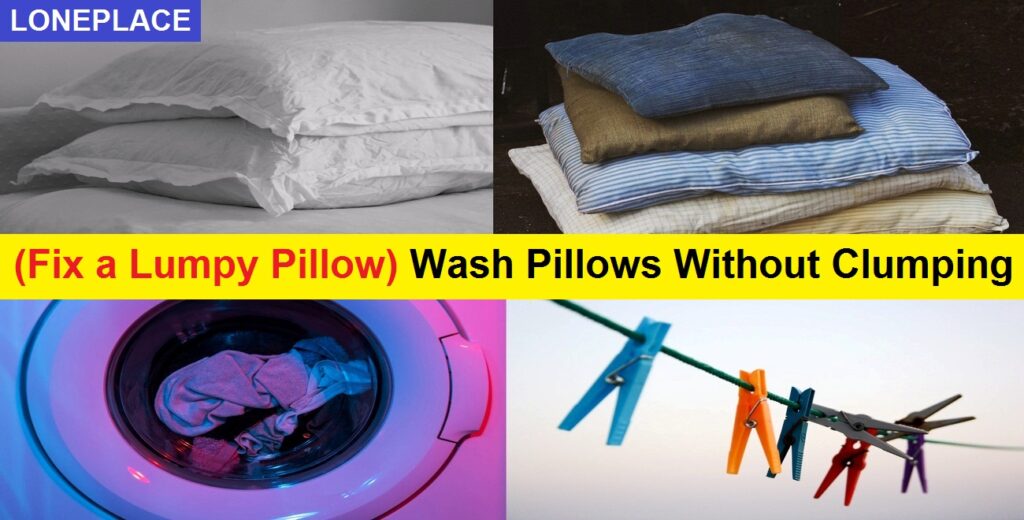
How to wash pillows without clumping? Pillows play a crucial role in providing us with a comfortable and restful sleep. Over time, however, pillows accumulate dirt, sweat, and oils, which can lead to clumping and a loss of their original shape and support. There’s nothing quite as frustrating as settling down for a comfortable night’s sleep, only to be met with a lumpy pillow that refuses to conform to your desired shape.
Washing your pillows is an essential part of maintaining their cleanliness and prolonging their lifespan. However, the challenge lies in ensuring that they are thoroughly cleaned without encountering the dreaded clumping effect. Fear not, for there are effective methods to wash your pillows while preventing clumping, allowing you to revive their fluffiness and retain their cozy embrace. Whether your pillow is filled with feathers, down, memory foam, or synthetic materials, there are practical steps you can take to restore its plushness and ensure a restful sleep.
In this guide on How To Wash Pillows Without Clumping, we will explore various techniques and tips that will help you wash your pillows without clumping and fix a lumpy pillow, ensuring that you can enjoy a rejuvenating sleep experience on freshly cleaned and plump pillows. Say goodbye to discomfort and hello to pillow perfection! Banish the lumps and embrace the joy of a smooth and inviting pillow surface once again.
Table of Contents:
Now How to Wash Pillows Without Clumping: A Fluff-tastic Guide
- Getting Started: Preparing Your Pillows for a Spa Day
Before we dive into the bubbly world of pillow washing, let’s start by prepping our fluffy friends for their much-deserved spa day. Firstly, remove any pillowcases or covers and give them a soft pat on the back for their service. Then, check the manufacturer’s instructions to make sure your pillows are machine-washable. We don’t want any pillow mishaps now, do we? Take a close look at your pillows for any stains or residue, and if you spot any, treat them with a gentle touch before proceeding. Remember, we’re aiming for pillows that are as fresh as a daisy. - The Art of Washing: Techniques to Keep Your Pillows Fluffy
Now that our pillows are ready to take a dip, let’s master the art of washing them without clumping. It’s best to wash two pillows at a time to maintain balance in the machine, ensuring a smoother washing experience. Choose a mild detergent that won’t irritate your pillows’ delicate sensibilities, and set your washing machine to a gentle or delicate cycle with a large load capacity. We want our pillows to have the freedom to dance around in there, don’t we? Let the gentle waves of the washing machine work their magic. - Drying Delicately: Say Goodbye to Lumpy Pillows
Ah, the drying stage, where we bid farewell to any potential lumps and bumps. Once your pillows have enjoyed their washing experience, it’s time to dry them with care. Remove them from the washing machine and give them a gentle squeeze to remove any excess water. Now, here’s a secret trick: place your pillows in the dryer on a low heat setting. But wait, there’s more! Add some dryer balls or a tennis ball wrapped in a clean white cotton sock to the mix. These little helpers will fluff up your pillows and prevent them from clumping together. Remember to check on your pillows every 20 to 30 minutes to ensure even drying. We want them to come out of the dryer feeling as light as a feather. - Maintenance Matters: Keeping Your Pillows in Pristine Condition
Fluffing is the name of the game when it comes to pillow maintenance. Regularly fluff your pillows to keep them in tip-top shape. If you have foam pillows, it’s best to give them a good vacuuming rather than subjecting them to the washing machine. And here’s a nifty trick: freshen up your pillows in the dryer by placing them on a low heat setting for a short time. It’s like a mini rejuvenation session for your beloved pillows. Just remember, happy pillows make for happier dreams. - Troubleshooting Tips: Dealing with Stains and Clumping Mishaps
Even with the utmost care, accidents happen. If your pillows have fallen victim to an unexpected stain, fear not! There are ways to tackle the situation. Treat the stain gently before washing, using a stain remover or a mixture of baking soda and water for those stubborn marks. And if, by chance, your pillows come out of the wash with a few clumps, fear not! Give them a good fluffing and a gentle pat, and they’ll bounce back to their fluffy glory.
So there you have it, my friend – a fluff-tastic guide to washing pillows without clumping. Follow these steps, and you’ll be on your way to a dreamy night’s sleep with pillows as fluffy as clouds. Remember, a little love and care go a long way in maintaining the comfort and coziness of your pillows. Happy washing, and sweet dreams!
(Wash by Hand) How to Wash Pillows Without Clumping Without a Washing Machine
- Step 1: Fill a Bathtub or Basin with Warm Water
Fill a bathtub or large basin with warm water. Ensure that there is enough water to fully submerge your pillows. - Step 2: Add a Gentle Detergent
Add a small amount of a gentle detergent to the warm water. Swirl the water with your hand to create a soapy solution. Be mindful not to use too much detergent, as it can be difficult to rinse out completely. - Step 3: Submerge and Agitate the Pillows
Carefully place your pillows into the soapy water, ensuring they are fully submerged. Gently agitate the pillows by pressing them down and moving them around with your hands. This motion helps to loosen dirt and debris trapped within the pillows. - Step 4: Focus on Stains or Soiled Areas
If your pillows have any visible stains or soiled areas, take some time to gently scrub those spots with a soft brush or cloth. Be gentle to avoid damaging the pillows’ fabric or filling. - Step 5: Rinse Thoroughly
Drain the soapy water and refill the tub or basin with clean, warm water for rinsing. Submerge the pillows and gently squeeze them to remove any soap residue. Repeat this rinsing process until the water runs clear, indicating that the pillows are free from detergent. - Step 6: Gently Squeeze Out Excess Water
Once your pillows are thoroughly rinsed, carefully lift them out of the water. Gently squeeze them to remove excess water, being careful not to twist or wring them, as this can cause clumping. - Step 7: Air Dry the Pillows
Find a clean and well-ventilated area to air dry your pillows. Lay them flat on a clean towel or drying rack. Make sure to flip them occasionally to ensure even drying. It may take a day or two for the pillows to completely dry, so be patient.
(Wash by Washing Machine) How to Wash Pillows Without Clumping in the Washer
- Step 1: Check the Care Label
Before tossing your pillows into the washing machine, check the care label to ensure they are machine-washable. If the label indicates they are not suitable for machine washing, follow the steps for hand washing instead. - Step 2: Load the Pillows into the Washing Machine
Place two pillows in the washing machine to maintain balance during the wash cycle. This helps prevent excessive clumping and ensures an evenly distributed load. - Step 3: Use a Gentle Cycle and Mild Detergent
Set your washing machine to a gentle or delicate cycle with warm water. Add a mild detergent, preferably one recommended by the manufacturer, to the machine. Using too much detergent can leave residue and contribute to clumping, so use the appropriate amount. - Step 4: Extra Rinse Cycle
Consider adding an extra rinse cycle to ensure all the detergent is thoroughly removed. This step helps prevent any lingering soap from causing clumping or discomfort when using your pillows. - Step 5: Dry with Care
Remove the pillows from the washing machine and gently squeeze out excess water. Place them in the dryer on a low heat setting. To prevent clumping, add a few dryer balls or a clean white cotton sock containing a tennis ball. These items help fluff up the pillows during the drying process. - Step 6: Monitor and Fluff
Check on the pillows every 20 to 30 minutes during the drying process. Gently fluff them and redistribute the filling to ensure even drying and prevent clumping. Be patient and allow the pillows to dry completely before using or storing them to avoid any potential mold or mildew issues.
Remember, whether you choose to wash by hand or in a washing machine, taking proper care of your pillows ensures they stay fluffy and comfortable, providing you with a restful night’s sleep.
How Do You Fix a Lumpy Pillow after Washing it
Ah, the dreaded lumpy pillow dilemma! It’s quite the pesky problem, isn’t it? But fret not, my friend, for I am here to share with you some nifty tricks to fix that lumpy pillow after washing it. Let’s dive right in, shall we?
- Step 1: Identify the Lumpy Areas
After washing your pillow, give it a good once-over to identify the lumpy spots. These are the areas where the filling has clumped together instead of distributing evenly. - Step 2: Fluff and Shake
Hold the pillow with both hands and give it a thorough fluffing. Vigorously shake the pillow to help redistribute the filling and break up the clumps. It’s all about loosening up those stubborn lumps! - Step 3: Manually Break up Clumps
If there are still noticeable clumps, it’s time to get up close and personal with your pillow. Use your hands to manually break up the clumps, gently pulling apart the filling and distributing it evenly. Take your time and be gentle, as rough handling may damage the pillow. - Step 4: Sunbathe or Air It Out
Now, here’s a delightful little trick that can work wonders for lumpy pillows. Find a sunny spot or a well-ventilated area and let your pillow bask in the sun or air out for a few hours. The natural warmth and fresh air can help fluff up the filling and restore its original shape. - Step 5: Give It a Good Beat
No, no, I’m not suggesting you take your frustrations out on your poor pillow. But a firm yet gentle beating can actually work wonders! Lay your pillow flat on a clean surface and use your hands or a soft object (like a tennis racket or a paddle) to gently beat the pillow in a rhythmic motion. This action can help dislodge any remaining clumps and restore the pillow’s fluffiness. - Step 6: Use a Dryer or Tumble Dryer Balls
If all else fails, you can try popping your pillow into the dryer. Place it inside, along with a couple of clean tennis balls or specially designed tumble dryer balls. The balls will bounce around during the drying process, helping to break up clumps and fluff up the filling. Use a low or delicate heat setting to avoid damaging the pillow. - Step 7: Patience, My Friend
Remember, my dear reader, fixing a lumpy pillow takes time and patience. Don’t expect overnight miracles! It may require a combination of these methods or repeating the steps a few times to achieve the desired fluffiness. But fear not, for with a little love and care, your pillow will be back to its lofty, cloud-like state in no time.
So there you have it, my friend, a handful of tried-and-true techniques to banish those lumps from your pillow. Embrace the fluff, and may your nights be filled with blissful, clump-free slumber!
How Do You Dry a Pillow Without it Getting Lumpy
Ah, the delicate art of drying a pillow without encountering the dreaded lumpy aftermath. It can be quite the challenge, but worry not, my friend, for I shall guide you through the process with finesse and grace. Here are the steps to ensure a lump-free drying experience for your precious pillow:
- Step 1: Gentle Squeeze to Remove Excess Water
After washing your pillow, give it a gentle squeeze to remove any excess water. Be careful not to wring or twist it vigorously, as this can lead to clumping. A light squeeze will do the trick! - Step 2: Use a Towel to Absorb Moisture
Place your damp pillow on a clean towel and roll the towel up, gently pressing down to absorb the moisture. This method helps to draw out excess water without putting unnecessary stress on the pillow’s filling. - Step 3: Air Dry in a Well-Ventilated Area
Find a well-ventilated area in your home, preferably away from direct sunlight, and lay the pillow flat to air dry. Avoid placing it on a surface that retains moisture, such as a wooden or plastic surface. Instead, use a drying rack or a clean towel to ensure proper airflow. - Step 4: Fluff and Flip
During the drying process, periodically fluff and flip the pillow to promote even drying and prevent any potential clumping. Gently massage and manipulate the filling with your hands to encourage proper airflow and restore its plushness. - Step 5: Patience, Patience, Patience
Ah, patience, my dear friend, is the key to success when it comes to drying a pillow without lumps. Allow ample time for your pillow to air dry completely. The drying time may vary depending on the pillow’s size, thickness, and the humidity in your surroundings. It’s better to be safe than sorry, so resist the urge to rush the process. - Step 6: Optional: Low Heat in the Dryer
If you’re short on time or prefer a faster drying method, you can opt to use the dryer. Place your pillow in the dryer on a low heat or delicate cycle. To prevent clumping, add a couple of clean tennis balls or specially designed dryer balls. These little helpers will bounce around and fluff up the pillow during the drying process. Keep a close eye on the pillow, and remove it promptly once it’s dry.
Remember, my dear reader, drying a pillow without encountering lumps requires a delicate touch and a dash of patience. By following these steps and treating your pillow with care, you’ll be rewarded with a fluffy, cozy companion for your slumbering adventures. Sleep well, my friend, and may your pillow remain lusciously lump-free!
How Often To Wash Pillows
Ah, the question of how often one should wash their beloved pillows. It’s a topic often debated among individuals, as personal preferences and circumstances can vary. However, allow me to provide you with some general guidelines to help you determine the ideal frequency for washing your pillows.
First and foremost, it’s important to note that pillows, much like ourselves, accumulate dust, sweat, body oils, and other unmentionables over time. These factors can contribute not only to a less-than-fresh sleeping experience but also to potential allergens and hygiene concerns. Thus, regular pillow cleaning is essential for maintaining a clean and healthy sleep environment.
To keep things simple, let’s break it down into two categories: synthetic-filled pillows and down or feather-filled pillows.
- For Synthetic-Filled Pillows:
It is generally recommended to wash synthetic-filled pillows every six months to a year. However, if you suffer from allergies or have respiratory sensitivities, you may benefit from more frequent washing. Additionally, if your pillow becomes visibly soiled or develops an unpleasant odor, it’s a clear sign that it’s time for a cleansing session. - For Down or Feather-Filled Pillows:
Down and feather-filled pillows require a bit more care due to their delicate nature. It is advisable to wash them every six months to a year, similar to synthetic-filled pillows. However, if you use a protective pillow cover or pillowcase and regularly fluff and air out your pillows, you may be able to extend the time between washes. As with synthetic-filled pillows, if you notice visible stains, odors, or any signs of allergens, it’s best to wash them promptly.
Now, let’s not forget about pillow covers and pillowcases! These marvelous creations serve as a protective barrier for your pillows, shielding them from direct contact with body oils, sweat, and other lovely things. It is recommended to wash your pillow covers and pillowcases every one to two weeks to maintain cleanliness and freshness.
Of course, it’s important to consult the care instructions provided by the manufacturer or check the pillow’s label for any specific washing guidelines. Some pillows may have specific requirements due to their unique construction or materials.
In summary, my dear reader, washing your pillows every six months to a year is a good rule of thumb, but do consider your personal circumstances and preferences. Regular cleaning, along with the use of protective covers, will help ensure that your pillows remain fresh, cozy, and oh-so-inviting. Happy pillow washing, and may your slumber be sweet and serene!
Fill Your Home With Positivity
Fill your home with happiness, and it will overflow into your life. Create a home that nurtures your spirit and fills your heart with joy.
Take a Closer Look